Chris Padilla/Blog
My passion project! Posts spanning music, art, software, books, and more. Equal parts journal, sketchbook, mixtape, dev diary, and commonplace book.
- Setting Up a MongoDB database to store subscriptions
- Writing my Schema for the above.
- Importing Pete's mailer.js file for formatting and sending email templates
- Integrating the API endpoint in my Next.js app under
/pages/api/subscribe.js
Day Dreaming Pup
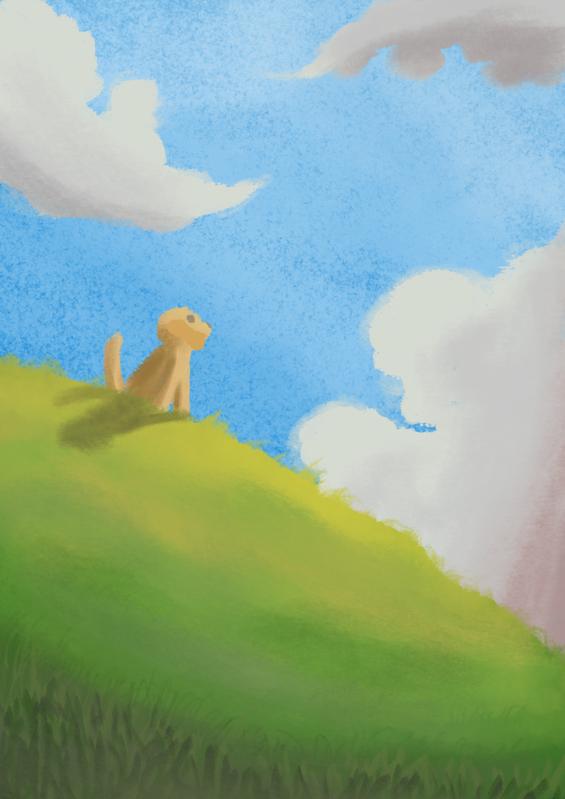
Love painting this pup. Lucy is becoming my muse! 🐕
Brian Eno on Music and Painting
Sourced from Austin Kleon in his newsletter this week, Brian Eno's 2011 Moscow lecture.
Eno talks on how music (especially classical music) was a performative, hierarchy driven medium. Recorded music, however, takes out that hierarchy and makes the act of creating music more like painting. Really beautiful ideas, the whole thing is worth a listen.
Type Hinting in Python
After spending some time in Java, TypeScript, and C#, I've started to miss typing when it's not there.
While Python won't keep from compiling if there's a type issue, the autocomplete and clarity that comes with Type Hinting is a boon to productivity and clarity.
The Basics
A quick, simple example:
def say_name(name: str) -> str:
    return "My name is " + name
name: str is declaring that name is the built-in string type. The -> str denotes that we are returning a string.
Not Fool-Proof
Say that there are some conditions to the function:
def say_name_if_starts_with_j(name: str) -> str:
    if name[0] is 'J':
        return "My name is " + name
    else:
        return False
I've said this method will return a string, but in some cases it returns a boolean. In statically typed languages, this would raise an error at compile time, and/or my editor may alert me to the issue. In Python, however, these are only hints. So this code flies.
Let's fix it before moving on:
from typing import Union

def say_name_if_starts_with_j(name: str) -> Union[str, bool]:
    if name[0] is 'J':
        return "My name is " + name
    else:
        return False
Why It's Called Type Hinting
The main benefit here comes later as I'm calling the function. Say I'm in the middle of writing this code:
name = say_name_if_starts_with_j("Jake The Dog")
name.capitalize()
# autocomplete suggests string methods, such as "capitalize"
Because we've gone through the trouble of typing our return value, my code editor knows to suggest string methods (as well as boolean methods!)
Hovering over the say_name_if_starts_with_j method now also includes a line recreating my defenition:
(method) def say_name_if_starts_with_j(
    name: str
) -> str
We're missing some of the compiling and linting benefits of statically typed languages out of the box with Type Hinting. However, it's a feature of the language that still has value in communication!
Typing here allows for me to be intentional with my methods and allows for an opportunity to communicate clearly the expected inputs and outputs of my function. One less trip to another tab in my code editor or browser can go a long way for keeping the flow going.
Foolin' With Funk
Groovin' on a Sunday mornin'
Sunset Over Campion Trail Creek
Our favorite time to walk the trail 🌅
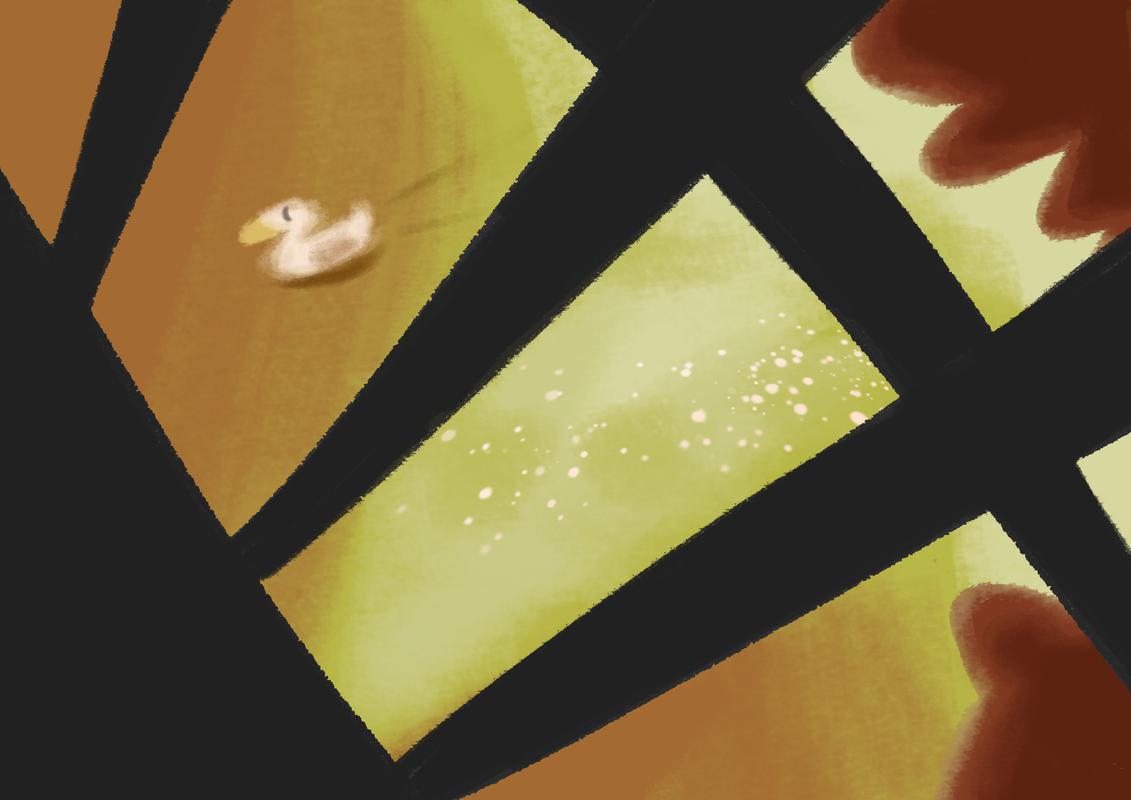
Raspberry Snow Cone
Recording a new album! Bit of a rock ballad vibe
Vintage Computer Festival Southwest!
I recently attended Vintage Computer Festival Southwest. It's a great, no frills celebration of the history and preservation of personal computing. Everything from Atari machines to the single body iMac G3's were present!
We're pretty spoiled with technological advancement and availability over here in the US of A. It's easy to forget how phenomenal what we have is.
If you haven't fooled with a classic computer in a few decaeds — it's an interesting cocktail of experiences! One part nostalgic, a dash of disorientation (how does this work again?), sometimes impressive for the time, and other times quaint.
One thing that was consistent across the folks I chatted with: Everyone had a story where their eyes brightened, the conversation got spirited, and they could tap into an early memory of being enamored with what was possible with a machine. Be it putting a PC together, playing games, or programming.
If you're really open to taking a step into your own early memories with these machines, there's a unique opportunity. It's a chance to connect with the spirit of why technology matters beyond its pragmatic function: to inspire awe and wonder.
(If you're looking for a quick taste, I'd recommend LGR on YouTube. I could watch this man repair 90s PCs for days on end.)
Dreamy Fields

My favorite thing about learning to paint is how sunsets are now even more beautiful to look at. 🌅 🐑
Sending Email From a Next.JS App
My favorite spot to catch up with writers and artists is from the comfort of my own email inbox. Social media algorithms are fickle and too bite-sized to be sustaining. But sitting down for a couple of minutes to read an email long form is a delight!
I was curious about implementing the infrastructure for this very site. I don't plan on going full-on email marketer! I am interested, though, in a once or twice a year short note on what's going on in my corner of the internet.
And, the fun part — It means getting to write some node code to set up an email subscription flow!
API
My implementation started as a fork of Pete Houston's Simple Newsletter repo on GitHub. If you want to get started quickly with a project like this, I'd highly recommend taking a look there!
I'll breeze through, doing a few steps "off-camera first":
This setup is fairly similar to my DIY Analytics put in place for a separate React project.
Writing /pages/api/subscribe.js will expose my endpoint at chrisdpadilla.com/api/subscribe. A POST request there will submit data to save the user subscription and send a welcome email.
Client Flow
Writing the client flow is just good-ol' React. I'll be using state, submitting a form, and handling the results.
On my subscribe.js page, I'll start by setting up state for form fields:
export default function Subscribe() {
  const [firstName, setFirstName] = useState('');
  const [lastName, setLastName] = useState('');
  const [email, setEmail] = useState('');
  const [frequency, setFrequency] = useState('ALL');
  const [submitting, setSubmitting] = useState(false);
  const [error, setError] = useState(false);
  const router = useRouter();

  ...

}
I'm also bringing in the useRouter hook to later forward the user to a success page on completion.
Next, we'll render the form:
return (
    <Layout>
      <Head>
        <title>Newsletter | Chris Padilla</title>
      </Head>
      <Header />
      <Container>
        <h1>Email Newsletter</h1>
        <p>A quiet set of updates — just a couple a year — on what I'm up to. Unsubscribe anytime.</p>
        <p>Looing to update your subscription? <Link href={`/update-sub`}>Click here</Link>.</p>
                <form onSubmit={onSubmit}>
          <label htmlFor="firstName">First name:</label><br />
          <input type="text" id="firstName" name="firstName" required value={firstName} onChange={e => setFirstName(e.currentTarget.value)} /><br />
          <label htmlFor="lastName">Last name:</label><br />
          <input type="text" id="lastName" name="lastName" required value={lastName} onChange={e => setLastName(e.currentTarget.value)} /><br />
          <label htmlFor="email">Email:</label><br />
          <input type="email" id="email" name="email" required value={email} onChange={e => setEmail(e.currentTarget.value)} /><br />

          <button type="submit" disabled={submitting}>{submitting ? 'Submitting...' : 'Sign Me Up!'}</button>
          {error && (
            <p>Oops! Something went wrong... try refreshing. If all else fails,  <Link href={`/contact`}>
            <a>reach out to me directly.</a>
          </Link>.</p>
          )}
                </form>
      </Container>
    </Layout>
  );
Next I'll handle radio elements for emailing frequency. Most input fields are simple enough with one element. Radio elements, however, require special logic to work. Here, I'm setting the value to true only if our state matches the current element. The onChange is then responsible for updating the state to its value.
<fieldset value={frequency}>
  <legend>How often would you like to receive emails?</legend>
    <input type="radio" id="contactChoice1" name="frequency" value="ALL" checked={frequency === 'ALL'} onChange={e => setFrequency("ALL")}/>
    <label htmlFor="contactChoice1">Sometimes (a few times a year)</label>

    <input type="radio" id="contactChoice2" name="frequency" value="SOME" checked={frequency === 'SOME'} onChange={e => setFrequency("SOME")}/>
    <label htmlFor="contactChoice2">Rarely (once a year)</label>

    <input type="radio" id="contactChoice3" name="frequency" value="UNSUBSCRIBE" checked={frequency === 'UNSUBSCRIBE'} onChange={e => setFrequency("UNSUBSCRIBE")}/>
    <label htmlFor="contactChoice3">None</label>
  </fieldset><br />
Now for submitting the form! My submit handler will set the submitting state so the input button won't accidentally be double-clicked.
Then, I'll gather the values from state. From there, the fetch API is used to send the request. And upon successful submission, the user is then redirected to /subscribed?n={firstName}. The query param is added to customize the message when they land.
That's all there is to it! There's more work involved with handling updating subscription status and using the templates. If your curious, I'd recommend digging into Pete Houston's Simple Newsletter repo and playing with it yourself!
Shirō Sagisu – Rei 1
From Neon Genesis Evangelion! So mysterious. Who is Rei? What is her DEAL even???
Campion Trail
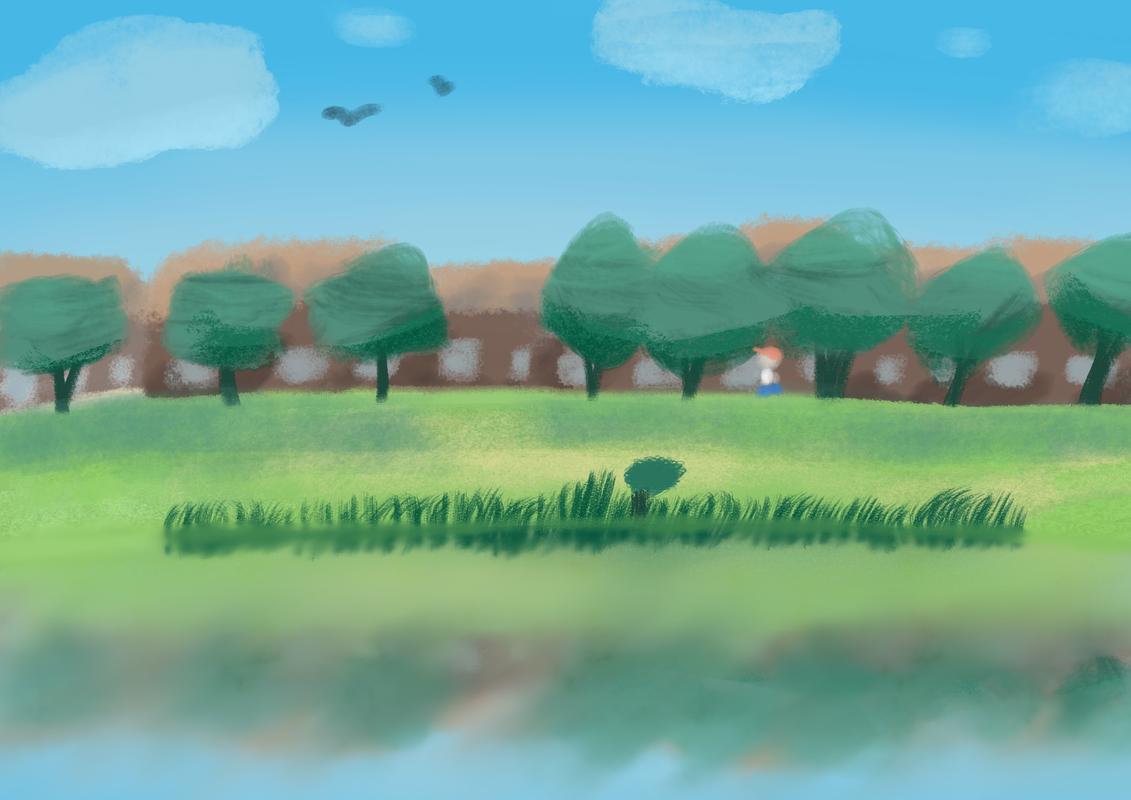
Beautiful trail views close to home! 🌳
Generating Back Links For Optimal Digital Gardening
I came across Maggie Appleton's tremendous post "A Brief History & Ethos of the Digital Garden"!
I've heard of the publishing philosophy in passing and found the term itself to resonate. A counter to high-production, corporate leaning purposes for owning a domain name, a digital garden assumes work in progress, a broad spectrum of topics and interests, and an ever evolving space online where ideas and things of beauty can blossom. Lovely!
There are a few patterns that show up with folks that have taken on the spirit of digital gardening. One that caught my eye was "Topography over Timelines."
Gardens are organized around contextual relationships and associative links; the concepts and themes within each note determine how it's connected to others.
This runs counter to the time-based structure of traditional blogs: posts presented in reverse chronological order based on publication date.
Gardens don't consider publication dates the most important detail of a piece of writing. Dates might be included on posts, but they aren't the structural basis of how you navigate around the garden. Posts are connected to other by posts through related themes, topics, and shared context.
One of the best ways to do this is through Bi-Directional Links – links that make both the destination page and the source page visible to the reader. This makes it easy to move between related content.
Because garden notes are densely linked, a garden explorer can enter at any location and follow any trail they link through the content, rather than being dumped into a "most recent” feed.
Love it! My favorite discoveries are with sites that link well. It's a blast hopping around, continuing the conversation from page to page. Wikis are the prime example of this. Tough, some bloggers like Austin Kleon also do this particularly well.
So! Why only be bound by linking in one chronological direction? I took to the idea and whipped up a script to employ this myself!
Developing Bi-Directional Linking
This site uses markdown for posts. So doing this job is largely about text parsing. Much of the logic, in fact, is similar to how I parse my posts to display an art grid.
I'll start by writing the function to actually get the url value from my links. The regex is looking for the value with parenthesis in the typical markdown shorthand for links: 
// api.js

export const getInternalLinksFromMarkdown = (md) => {
  const regex =
    /(?:__|[*#])|\[(.*?)\]\(\/(.*?)\)/g;
  return Array.from(md.matchAll(regex)).map((res) => {
    if (res && res.length > 1) {
      return res[2];
    }
  });
};
The value of index 2 of the array will give me the capture group I've targeted because that's how it's done in Node!
From here, I'll then pass in my posts and systematically generate an object that grabs both the targeted url as well as the current post url.
// api.js

export function getAllPostRefs(
  fields = ['content', 'slug', 'title'],
  options = {}
) {
  const slugs = getPostSlugs();
  let posts = slugs
    .map((slug) => getPostBySlug(slug, fields))
    // Filter false values (.DS_STORE)
    .filter((post) => post)
    // sort posts by date in descending order
    .sort((post1, post2) => (post1.date > post2.date ? -1 : 1));

  const links = {}
  posts.forEach((post) => {
    const postLinks = getInternalLinksFromMarkdown(post.content);
    postLinks.forEach((src) => {
      if (src && !src.includes('/')) {
        if (!links[src]) {
          links[src] = [];
        }
        if (!links[src].find(entry => entry.slug === post.slug))
        links[src].push({
          slug: post.slug,
          title: post.title,
        })
      }
    });
  })

  return links;
}
A Set data structure would be ideal for keeping duplicates out of the list, but we'll be converting this to JSON, and I'd rather avoid the hassle of bringing in a library for the conversion.
Finally, I'll call this function and save the results to a JSON file for refference.
biDirectionalLink.js

import { getAllPostRefs } from "./api"
const FileSystem = require("fs");

export const getRefs = () => {
    const links = getAllPostRefs();
    FileSystem.writeFile('_cache/backlinks.json', JSON.stringify(links), (error) => {
    if (error) throw error;
  });
}
Here's an snippet of what it generates:
{
    "30": [
        {
            "slug": "2022",
            "title": "2022"
        },
        {
            "slug": "iwataonpeople",
            "title": "Iwata on Creative People"
        },
        {
            "slug": "transcience",
            "title": "Transience"
        },
        {
            "slug": "web2000",
            "title": "A Love Letter to 2000s Websites"
        }
    ],
    "2022": [
        {
            "slug": "testingandwriting",
            "title": "Testing Software for the Same Reason You Write Notes"
        }
    ],

    ...
}
Voilà! Now I have the data of pages that are referenced. I can now call this method anytime the site regenerates and use this as the source of truth for back-linking.
To consume this in Next.js, I'm going to read the file in getStaticProps (or in an RSC if I were using the App Router)
// [slug].js

export async function getStaticProps({ params }) {
  if (post) {
    const file = await fs.readFile(process.cwd() + '/_cache/backlinks.json', 'utf8');
    const backlinks = JSON.parse(file);
    let pagesLinkingBackTo = null;

    if (backlinks[params.slug]) {
      pagesLinkingBackTo = backlinks[params.slug];
    }
And, following some prop drilling, I can now programmatically display these on matching pages:
// backLinkSection.js

import React from 'react';
import NextLink from './NextLink';

const BacklinksSection = ({pagesLinkingBackTo}) => {
    if (!pagesLinkingBackTo) return <></>
    return (
        <aside>
            <h4>
                Pages referencing this post:
                <ul>

                {pagesLinkingBackTo.map(link => (
                    <li><NextLink href={link.slug}>{link.title}</NextLink> </li>
                ))}
                </ul>
            </h4>
        </aside>
    );
};

export default BacklinksSection;
Assuming I haven't link to this page yet, you can see this in action at the bottom of my Parsing Mardkown in Node post. Now with handy links to click and explore related topics.
I'm excited to keep tending the garden! I've already seen themes emerge through the regular tags I use. Here's to a great harvest someday!
Beethoven – Sonatina No 1 Exposition
Short and sweet this week! A little phrase from a very young Beethoven.
Pratchett on English Gardens
I revisited a passage from Sir Terry Pratchett's "A Slip of the Keyboard." The essay "Magic Kingdoms" illustrates the English dedication to maintaining a garden in any environment. Pratchett uses this as an exemplification for how the garden is a portal to another world, and a widespread fascination with planting a garden is why fantasy is part of the fabric of the culture.
I remember a back garden I used to see from the train. It was a very small garden for a very small house, and it was sandwiched between the thundering railway line, a billboard, and a near-derelict factory.
I don't know what a Frenchman or an Italian would have made of it. A terrace, probably, with a few potted plants and some trellis to conceal the worst of postindustrial squalor. But this was an Englishman's garden, so he'd set out to grow, if not Jerusalem, then at least Jerusalem artichokes. There was a rockery, made of carefully placed concrete lumps (the concrete lump rockery is a great British contribution to horticulture, and I hope one is preserved in some outdoor museum somewhere) There was a pond; the fish probably had to get out to turn around. There were roses. There was a tiny greenhouse made of old window frames nailed together (another great British invention). Never was an area so thoroughly gardened, in fact, as that patch of cat infested soil.
No attempt had been made to screen off the dark satanic mills, unless the runner beans counted. To the gardener, in the garden, they did not exist. They were in another world.
For me there's another comfort in the scene. Even if we're not nurturing plants, we all have the means to cultivate our own creative gardens. A sketchbook, journal, blog, a song. And it doesn't matter how humble! A jar of soil and basil goes a long way for bringing life to a space. So it is with strumming strings and moving the pencil.
Hey!

A very warm color palette for crazy hot summer days.